TV aerial Installer that plunged to his death….
After finding out that a TV Aerial engineer fell to his death I felt that as an aerial engineer my self it scares you to think that could be you or me. So please be safe and wear your safety equipment.
Bosses at an aerial installation firm did not carry out safety checks before a dad-to-be plunged to his death from the roof of a five-storey building. An inquest heard that Stuart Shockledge, 27, fell to his death while working as an engineer for Ashton firm Astbury Digital just days after learning his wife Sarah was expecting their first child.
Bosses at an aerial installation firm did not carry out safety checks before a dad-to-be plunged to his death from the roof of a five-storey building.
An inquest heard that Stuart Shockledge, 27, fell to his death while working as an engineer for Ashton firm Astbury Digital in April 2008 — just days after learning his wife Sarah was expecting their first child.
She told the inquest her husband had been impressed with the safety credentials of his employers.
She said: “He was really happy there and said they were a lot more conscious about health and safety than the places he had worked at before. He was a careful but efficient worker, he liked getting things done quickly but he wasn’t one to take risks where work was concerned.”
The hearing at Manchester Crown Court was told no written records were made of the dangers involved with the installation work at the block of 48 flats in Palatine Road, Didsbury, before Mr Shockledge, of Lakes View, Stalybridge, arrived at the site.
Christopher Threadgold, general manager at Astbury Digital, told the court: “At the time of the accident no separate risk assessments were made with the jobs. Engineers were expected to assess the risk for themselves at the site on each job. I don’t think anyone had been up to the roof before the accident but I feel the risk could have been assessed without going out on to the roof.
“It was up to the engineer to interpret what they felt was safe. If they felt it wasn’t safe and had chosen not to do the job there wouldn’t have been any recrimination.”
Mr Shockledge had not been wearing a safety harness at the time of the fall, with the firm has also chosen not to use a hydraulic lift at the site due to a lack of access.
The court was told that fellow Astbury Digital engineer Steve Heap, who had been working in a two-man team with Mr Shockledge on the day of his death, had told police that employees had not been taught how to drill fixation points for the harnesses.
Mr Threadgold, who was placed in charge of the company’s health and safety following the accident, said: “Employees are sent on working at heights course, but I don’t know what’s on the course other than the feedback I get from engineers.
“If there is no natural fixation point at the site, and there is nowhere to drill a new one we would expect the engineers to ring back to the office and explain the situation.
“They’re the ones at the sharp end who must decide whether or not a job is safe to do. It’s not written down in the documents, but it is known by the engineers that you don’t walk on the ridge of a roof.”
Mr Shockledge was pronounced dead at Wythenshawe Hospital an hour after he was discovered.
The sheltered accommodation block is owned by Guinness Northern Counties Housing Association, which had hired Astbury Digital to carry out maintenance work at the accommodation on several previous occasions.
IF YOU ARE A TV AERIAL INSTALLER PLEASE USE YOUR SAFETY EQUIPMENT IT COULD SAVE YOUR LIFE.
Aerial Installation and Height Safety
This section is mostly for the benefit of other installers, and gives personal views only, which should not be taken as any kind of recommendation or advice. Height safety is ultimately the responsibility of each individual concerned. I’m indebted to Jez Hunter of Rig Systems Ltd, Wadebridge for help with understanding the Work at Heights requirements and for many useful discussions on equipment options and safety.
The equipment required to meet H & S guidelines is a significant expense for installers and needs to be carefully considered, particularly for a first-time purchase. Being able to discuss with Jez the equipment options, usage and limitations have proved extremely helpful for me, and I’d strongly recommend this approach before committing to an item. Jez has an excellent knowledge of all aspects of height safety (not just aerial installation) so he’s a useful person to know.
Current health and safety legislation requires aerial installers to have appropriate training in the use of height safety equipment and to implement this when working at height. The basic requirement is for the installer to secure the ladder (or ladders) and to use a fall arrest system.
The preferred method to secure the main ladder is to drill a hole in the wall and use an eye bolt with a strap taken through a ladder rung and tensioned to pull the ladder into the wall slightly. This method works well and minimises ladder bounce when using a long extension.
The only issue here for customers is with the hole drilled in the wall of their house. A hole for an eye bolt will be necessary (unless an equivalent alternative is available) which will either be fitted with a plug or filled with a sealant after completion of the job.
Ladder safety precautions ensure that the base of the ladder will not move out from the wall and that the top of the ladder cannot slide sideways. Having established a secure ladder, the height safety regulations then require the use of a fall arrest system with the ladder, unless the ladder access is required for a short duration only and three points of contact (e.g. two feet and one hand) can be maintained at all times.
The recommended fall arrest system uses a rope secured to the top rung of the main ladder (and a second rope attached to the top rung of the roof ladder if it is being used) with a rope grab, attached to the installer (wearing a safety harness) using a karabiner. To transfer from the main ladder to the roof ladder requires the use of an additional short lanyard, used to secure the installer to the main ladder whilst he removes the rope grab from the main ladder and attaches it to the rope on the roof ladder. This level of complication illustrates the need for training in the use of this kind of equipment.
When I’ve asked other installers about height safety and how often they use their fall arrest equipment, typically the answer is that they’ll always try to avoid using it. Ladder securing systems rate highly with installers, but the fall arrest gear is often felt to compromise their ability to “do the job”.
Two particular aspects of fall arrest equipment that directly affect aerial installers are:
a)The safety harness, which has two attachment points (front and rear), with the front (sternal) attachment used with a karabiner to connect to the rope grab. From an installer’s point of view, the safety harness provides no additional function, other than this attachment point, and potentially interferes with wearing a tool vest (containing all manner of spanners, screwdrivers, connectors and other essential “stuff”).b)The rope grab, which is intended to “follow” the installer up the rope on the ladder, and similarly “follow” him down again (gently pulling on the attachment makes the rope slip through the grab without it biting onto the rope). In a fall situation, the rope grab jams itself onto the rope and can only be released by removing the load (i.e. the installer’s body weight). This works OK on the main ladder, but the grab can tend to “snag” when descending an inclined roof ladder as gravity isn’t assisting its descent. From an installer’s point of view, this is problematic, as he may well have an old aerial and mast to remove from the roof/chimney in one hand, and doesn’t want to use the other hand to continually have to “free” the rope grab.
Similarly, when ascending the main ladder with a new aerial and mast in one hand, attaching the lanyard and swapping the rope grab onto the roof ladder with the one remaining empty hand is relatively difficult and leaves no hands available for holding on to the ladder.
Looking at these safety equipment items in turn, what options are there to mitigate the perceived complications?
Safety Harness
A 2 point full body harness meets the regulatory requirement and is typically issued as PPE to installers. The essential feature of the harness is the front (sternal) attachment:


To be effective, the sternal attachment point must be accessible, which tends to suggest that the harness should be worn on the outside of any other clothing. However, for aerial installers, the key item of clothing for “doing the job” is a tool vest, which typically has to carry the following items:
Spanners, screwdrivers, cable stripper, compass, knife, cable cutters, pliers, insulation tape, sockets & SDS adapter, coach bolts, wall plugs and cable clips.

The installer wants all of these tools easily accessible, so typically requires the tool vest on the outside of any other clothing. CleTheol vest cannot be used under the safety harness as the tools will be inaccessible and will interfere with the fit of the harness. So can the harness be used under the tool vest?
The answer is yes, but it requires the tool vest to either have a gap between fasteners at the front or to be only partially zipped up, to leave clear access to the sternal attachment point on the harness. No great problem here, provided that the harness is comfortable and can be worn all day — this tends to be better with harnesses that have wider straps or possibly some “give” in elastic sections.
There are a couple of further considerations for the safety harness, which are associated with having a waist belt incorporated into the harness. Without an integral belt, the harness is just PPE and offers no further incentive to the wearer to use it. However, incorporating a harness waist belt fitted with tool loops and lateral attachment points begins to offer additional features that make the harness more useful for “doing the job”.
A waist belt allows items such as tool holders to be attached, though most aerial installers would still favour a tool vest. The waist belt also provides lateral attachment points, which enables a work positioning lanyard to be used. The work positioning lanyard (e.g. a Petzl Grillon) gives the installer a much more flexible system which is still compatible with the rest of the height safety gear.
Specific applications for work positioning/work restraint are:
Large chimney stacks — where access around the stack (to position the corner plates under a lashing wire) would otherwise be difficult.
Flat roofs — where access to the edge may be the only way to allow large items (like a satellite dish) to be hauled up the outside of the building.
N.B. work positioning equipment still requires a separate fall arrest system to be used.
The following photographs show a Petzl Navaho Bod harness; a Bosch tool vest (without the harness underneath) and the tool vest with the harness underneath. Having a harness with wide bands for the leg loops, waist belt and shoulder straps significantly improves comfort for the wearer and enables the harness to be worn all day if necessary. Additionally, the risk to the wearer from being suspended is reduced.


The upper fasteners for the tool vest have been closed behind the sternal attachment and karabiner in the third photo above. The lateral attachment points and tool loops (visible in the first photo above) are accessible through the gaps at the sides of the tool vest, with all the tools in the vest fully accessible.
Fall Arrest System
The SKR rope grab (shown below left) works well on a vertical or near-vertical rope and can be used effectively on the main access ladder.


On the right-hand side above is a Petzl ASAP fall arrester. These two units have subtly different operating methods:
The SKR device works by having a sprung pivoted runner pressing onto the rope which jams the rope when a load is applied downwards on the attachment point. The unit will hold itself in position on a rope and will descend when a small downwards force (drag) is applied at the attachment point, using a combination of gravity on the unit itself and a downwards (light) pull. A heavy pull causes the device to grab the rope. When used on sloping ropes (e.g. on a cat ladder), gravity contributes much less, and the device tends to grab with even a light pull on the attachment point.
The Petzl device also has a sprung pivoted component, but this is independent of the attachment point which is provided by a karabiner through the body of the ASAP device (and which also keeps the rope in the correct position). The ASAP has spiked teeth (slanting) around a rotating wheel, with the axle mounted on the sprung pivoting section. When ascending the rope, the downward pointing teeth (at the contact point with the rope) slip over the rope jacket. When descending, the rope the teeth bite into the rope, but with a light pull the wheel can rotate (it feels stiff to the fingers) and the device is easily pulled down the rope. With a greater downwards force applied, the toothed wheel bites into the rope, but now the wheel jams the rope against the body of the device, thus grabbing the rope.
The advantage of the ASAP device is that it doesn’t rely on any contribution from gravity, and hence can be used just as effectively on an inclined rope. The disadvantage of the ASAP is that it may not grab the rope quite as quickly as the SKR device — Petzl make a shock absorber (ASAP Sorber) which can be used in conjunction with the device, and which provides a little more “freedom”, but the ASAP can also be used on its own. The ASAP does cost more than the SKR as a fall arrest solution.
Rope Attachment
The manucroche is the recommended way of attaching the rope onto the top rung of the ladder. This gives a rapid attachment, but the manucroche doesn’t grip the ladder rung, and as a result, tends to move around in use. An alternative is to use a scaffold sling on the top rung, which requires an additional karabiner, but allows the rope to be positioned where required (e.g. at one side of the ladder) and keeps it there.


The attachment to the ladder rung is worth consideration here — should a fall occur, the dynamic shock load (of a falling person) has to be sustained by the rope grab, the rope itself, the rope attachment and also by the ladder rung. This is what differentiates a “DIY” ladder from a “trade” ladder, where the rungs and stiles are stronger and meet the requirements of EN131, but the same may not necessarily be true for a roof ladder — this should be checked before relying on it. The same consideration also highlights why the main ladder is secured so well (to prevent it from moving), and why it is essential to secure the roof ladder properly.
Work Positioning
For aerial installations, a chimney strop is available which provides a temporary anchorage point around e.g. a chimney stack.

The strop comprises a steel cable covered with a durable nylon jacket, giving it the appearance of a climbing rope but a lot heavier! One end has a hook which connects to the ring on the rope grab. This enables the strop to be fitted around a chimney stack and then pulled tight enough to remove most of the slack. This gives a temporary connection point for the attachment of a lanyard.
The installation of the chimney strop can be tricky — the device is supposed to be made into a loop and “thrown” over the chimney stack. This may not be possible, however (especially if an old aerial is in the way), but tricks such as using a tennis ball attached to a piece of string can be used to get “something” around the stack which can then be used to pull the chimney strop around.
Once in place, connecting to the chimney strop is achieved using a lanyard. The recommended lanyard (the same one used when transferring the rope grab from the main ladder to the roof ladder rope) is very short and non-adjustable, which can make it awkward to use around the stack. An alternative is to use an adjustable lanyard (e.g. Petzl Grillon):

The Grillon is used with both side (lateral) attachment rings on the waist belt of a harness to form a loop around a suitable attachment point, leaving a free end of the rope. The Grillon includes its rope grab, which can be adjusted to set the length of the rope loop so that a comfortable working position can be found. As stated previously, the use of work positioning lanyards still requires an independent fall arrest system to be used.
Best Practice
Before starting on any activity requiring the use of ladders, a risk assessment has to be done, to identify all the hazards and options to mitigate their impact. Aerial installation can include aspects of working at height that may not be ideal, but for which there is no readily available alternative. In these circumstances, the risk assessment provides the means to assess whether these risks are considered acceptable, or whether some alternative needs to be implemented.
When an aerial and mast needs to be either taken up or down a roof ladder, the task does not take any significant time on the ladder but it can be difficult to maintain three points of contact. Best practice may be achieved by using a rope on the roof ladder with a rope grab, but is the roof ladder suitable for this kind of loading and is there any other alternative? A different point of view could be to avoid the use of the rope grab on the roof ladder just for that particular stage of the installation, relying on the availability of three points of contact. This could be justified if the installer uses a sling (or other means of supporting the aerial, to keep at least one hand free) whilst transferring between ladders.
For roof ladders located close to a gable end on a roof, additional securing straps may need to prevent the ladder (and installer) coming off the ridge. Ultimately, there is no single method that can be universally applied to all installations. Each one has to be individually assessed, and the appropriate precautions taken for each job uniquely — which is why height safety training is essential to instil the necessary understanding.
Please Becarfull Installing your own aerial Indoor or out.
In theory, this does not sound like a difficult task, but it may involve working safely at height. Also note that while some installations are straightforward and can be attempted by any competent DIYer using common sense and some educated guesswork, the more tricky installs present a not insignificant technical challenge, and may require access to special equipment. If you have doubts about your ability to complete the job safely, then it’s better to call for professional help than risk falling off a roof. Producing a long-lasting installation also requires some careful attention to detail to ensure that aerial installations remain secure, and are not affected by the ingress of water.
Aerial position, Loft, Rooftop & Set-top

Small set-top aerial
The location you choose for your aerial can have a huge impact on its performance. In a strong signal area, this may be of little concern, however, in poor reception locations, it can make the difference between a good picture and something unwatchable.
Choose the first location in this list you can use. Each step down the list results in further loss of quality that can not be made up for in any way.
- Rooftop
- Loft
- Indoor aerial mounted as high up as possible
- Set-top aerial
Small set-top aerials vary in performance from poor to useless in most areas. In strong signal locations, one may be ok. The advantages are a minimal cost, no installation, and portability.
Aloft aerial may be quite satisfactory in some cases, but not always. It is often easier to install a loft aerial than a rooftop one, and they will usually last longer than one exposed to the elements.
In practice, roof mounting gives a much stronger and better quality signal. However, roof mounting is, of course, less convenient and more expensive. Outdoor aerials, poles and cables also have a limited life, so the expense is repeated later.
A rooftop gives the best vantage point for TV aerials for several reasons:
- Being higher up there’s usually less to get in the path of the signal from the transmitter. Even trees will affect signal levels — more so when in full leaf.
- There is no interaction with roofing materials.
- The aerial is further from sources of electrical interference in the house, improving the signal to noise (S/N) ratio
- TV aerials in a loft are affected to some degree by metalwork in the loft. Very high gain aerials are especially prone to this.
As an example of how much difference aerial location can make, here is an example of someone finding over 100 x the difference in signal level between loft and roof mount.
Practical advice on installing an aerial
First, choose your aerial and suitable cable.
While not optimal, in reasonable signal areas a loft aerial may be fine. If you are unsure it may be worth trying anyway since installing in a loft is safer and easier, and the aerial will probably last indefinitely without being used as a rest stop by every overweight pigeon in the area!
Loft aerials

Aerials are often bigger than they look from the ground
Tips:
- Keep away from wiring and metalwork where possible.
- Results looking “through” a gable wall may be dramatically different from looking through the tiles or slates.
- Don’t choose a position where it will have your eye out every time you climb through the loft hatch!
- Try alternate positions if you’re not getting the result you’d like
- If you have a metal roof, a loft aerial won’t work
Be prepared to accept that a loft mount may just not be good enough.
Roof Mounting
Roof-mounted aerials usually have the best chances of giving satisfactory performance. Aerials mounted on a gable wall or a chimney stack adjacent to a wall are the easiest to install. Mounting on a chimney that is in the middle of a hipped roof can present more of a challenge.
General Guidance:
- Choose appropriate mounting hardware — you generally need a lashing kit for fitting to a chimney, and you will normally need a bracket to hold the mast and provide some standoff to move the mast away from the building or chimney. Buildings with sizeable corbelled sections of brickwork or deep overhangs at the eaves may require longer brackets or a “cranked” mast (one with a double bend in it).

- Lashing kit and lightweight galvanised bracket — suitable for small aerials
- Galvanised bracketing lasts much longer than painted or powder-coated steel.
- All masts are light and easy to handle but choose an appropriate size. 40–50mm diameter ones with 1.6mm walls are far stronger than a thin-walled inch thick mast.
- Spread the load — with a gable wall fixing, use two brackets (often called T and K brackets) for the larger aerials and space them well out.
- Drill into the centre of the bricks, not the weaker mortar joints.
- Only use screw fixings where lashing isn’t possible, and avoid screwing into the top 3 courses of brick
- Take care near the top of a gable wall — there is little weight of brickwork resting on it, so it is not that strong and you can easily dislodge a brick.
- Bricks near the tops of walls have little weight on them and can be easily pulled out
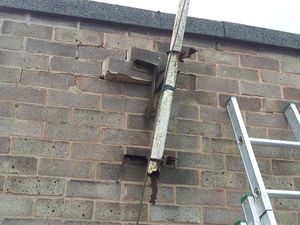
- Pay careful attention to the wind loading of an aerial — big aerials can exert a significant force in a strong wind that can pull out fixings, or snap masts that are too long or thin. In extreme cases, you can easily bring down a slender chimney stack with an oversized aerial!

- Too much wind loading from a pair of aerials, resulting in chimney damage
- Use appropriate fixings — ordinary wall plugs and screws may only be acceptable for small aerials in more sheltered locations. Bigger aerials may need coach screws and matching plugs or even expanding sleeve anchors.
- Take care when fixing near to the edge or top of the brick and block walls to not dislodge bricks when drilling, or to fracture them with expanding fixtures. Remember that the top courses of a gable wall, for example, have little weight of bricks over them, and hence little strength.
- Cranked masts impose a strong twisting force on the U bolts in the chimney/wall bracket.
Adjusting position for difficult reception conditions
- If more than one location is available, survey each position to see which is best. The easiest chimney to get to might not offer the best results!
- Height is important — raising an aerial as little as a metre can make a big difference to the signal level (and maybe preferable to using a larger aerial). The counterpoint to this advice may be where the problem is caused by tall trees. Using a lower location that can see under the branches may help here.
- If the line of sight is obstructed by a hill, try angling the aerial up slightly, or aiming slightly to the side of the hill even if that is not as accurate as straight at it.
- Multipath interference (i.e. what was known as “ghosting” on analogue transmissions), tends to be less of a problem with digital receivers which are better able to cope with it. However, it may explain poor signal quality in some cases. To reduce it, try a more directional aerial, and try different bearings. It may be preferable to switch to a different transmitter if one is available.
Polarization

Aerial with vertical polarisation
TV signals are usually broadcast from the main transmitters with horizontal polarization. Hence the TV aerial should be positioned horizontally. Some smaller relay transmitters, however, use vertical polarisation, and with these, the aerial will need to be rotated through 90 degrees (i.e. with its elements running up and down rather than across) when using these transmitters.
Check the polarization of the transmitter you’re receiving, or just turn the aerial to see which gives better reception.
Splitters, combiners, diplexers

Splitters split the signal from one wire into 2 or more feeds. Simply connecting multiple wires causes a greater reduction of signal, impedance mismatch, and signal distortion. (you can’t simply join and split TV coax like an electrical supply cable)
Diplexers separate UHF TV signals from VHF or DAB signals sent down the same lead. Avoid using a splitter in place of a diplexer, as these cause an extra 3–4dB loss, often degrading reception.
Combiners combine the output from UHF and VHF aerials, feeding them both down the same lead.
It is best to avoid cheap unscreened plastic diplexers & splitters. These let interference into the aerial system, known for causing picture freezes on digital TV. Prefer metal cased devices that offer better screening from external interference.
Extreme installations
To obtain long-distance (what is sometimes referred to as “DX”) TV reception, the following methods can be used to boost reception range. They’re not required for standard domestic setups.


Tall mast and tower-mounted aerials
Raising the height of an aerial can help with long-distance line of sight reception, avoiding all obstacles. Generally speaking, increasing aerial height does wonder for signal reception. However long masts will need serious fixing to match since they give the wind loading of an aerial extra leverage
Bayed and Stacked aerials
These arrangements combine the outputs of multiple aerials for greater output without the addition of noise that an amplifier causes. Designing and implementing them effectively normally requires specialist knowledge and test equipment, without which they tend to fail. Discussion of issues.
However the simplest version with two aerials bayed side by side, is not to difficult to implement if one ensures the cable feed from each aerial to the combiner, are exactly equal in length. Baying of aerials like this increases signal strength without needing to use large fragile expensive extra high gain aerials. It also tends to make the aerials more directional since signals hitting the pair off the main axis tend to cancel somewhat due to the different signal paths.

Pair of bayed 18 element aerials on a mast (shared with an FM radio dipole aerial)
Stacked aerials (note the aerial installation industry tends to use the phrase “stacked” for both bayed and stacked arrangements) can also be useful for rejecting unwanted signals introduced from above or below, such as caused by overflying aeroplanes.
Narrowband aerial array
Consists of an array of grouped frequency aerials — each covering a different group, with outputs combined as above. The result is full frequency reception with the better performance of narrowband aerials. This is often seen where it is necessary to combine reception from more than one transmitter to receive all the available channels. Special aerial combiners called diplexers can be used here — these include an element of filtering to accept only a specified range of frequencies into each input.

Good quality aerial mast-mounted amplifier, shown with its weather protecting cover raised
Low noise Aerial amplifier
A good quality aerial amplifier is often necessary for poor reception areas. One should select one with the lowest possible noise figure to amplify the signal with the minimum of noise introduction. System performance with an amplifier typically is at its best when the amplifier is placed close to the aerial on the mast, rather than close to the TV. Amplifiers of this type typically need a separate power supply. This can either be a dedicated box that feeds power up the co-axe to the amp or some TVs and set-top boxes also have the option of providing power up the co-axe.
Screening

For the lowest noise operation, all components should be fully screened to avoid picking up interference, which would degrade the quality of a weak signal. This not only means a good quality foil screened co-as like CT-100 or similar), but also using screened accessories. These can usually be recognised by the “fully enclosed” nature of any terminations. The modern screw-in F Connectors also offer good screening — so these are also often seen on the backs of wall plates etc.
Cable joints

Cable joint made with F plugs and a barrel connector. Once encapsulated in self-amalgamating tape this yields a very low loss effective cable joint not affected by water ingress
For any but the simplest systems, cables need to be jointed at various places. Any joints that are exposed to the weather must also be protected by being fully enclosed in a waterproof box, or with self-amalgamating tape. The self-amalgamating tape needs a little practice to apply well (the tape must be stretched before being used), but when mastered makes a fully waterproof connection. Connections made in normal electrical junction boxes orbits of the terminal strip, or worse, from taped up twisted together wire joints will dramatically lower the signal quality in any TV aerial system.
Ensure that when making connections to terminals, only the minimum required the length of the inner wire from the co-axe is exposed. All connections should be crimped, soldered, or fixed in screw terminals.

Even low-cost traditional Belling Lee style aerial plugs can be crimped with a pair of side cutters
Testing
The simplest test is to “suck it and see”. If the picture quality is fine, then there is a fair chance you have an adequate solution. You can add a little finesse to the testing process by trying the new aerial with a 6dB attenuator in line with the connection to the TV. Ensuring it still works with this should mean there is a little “headroom” to cope with days where signal reception is not as good generally, and with the slight drop in performance as the system ages. Try all the channels as well.
Test equipment
The simplest test equipment for an aerial installation is a TV. However, taking this up onto a roof is another matter.
- A small TV (eg 5") can be very useful here.
- A large TV on the ground can be used. For decent results, if possible also have a camera with the telephoto lens, binoculars or similar. It is not a good solution, but better than not seeing the picture at all.
- A remote helper watching the TV while in voice contact (via mobile phone if necessary) can work, but it is harder than it sounds.
- Signal strength & quality measuring devices work well and need no tv, but most DIYers don’t have access to them.
- Some digital TV set-top boxes also have diagnostic capabilities that allow them to report signal strength and signal quality. Search the menus to see what yours has.
More tricky installs can be very frustrating to DIY because much of the time you are working without adequate information. Alas, a multimeter is not going to help here, and a set of professional TV reception test gear could set you back several thousand pounds. Rental may be an option, however, there are some intermediate level test gear products that can provide massive assistance without breaking the bank such as TV Aerials Oldham.
Created October 13, 2019 at 10:27PM
/
View Google Doc
No comments:
Post a Comment